
This page explains how to set up Microsoft Outlook 98 or Outlook 2000 to send and receive e-mail for a POP mailbox that you've created. (The screen shots below are from Outlook 2000, although Outlook 98 is similar.)
Tip: make sure that the program you are using is Microsoft Outlook, and not Microsoft Outlook Express. These two similarly named programs have different set up instructions. Be sure you do not see the word "Express" on the screen when you start the program.
1. Start the Microsoft Outlook program.
You can use the Start menu to start Outlook. When it opens, click Tools, then Accounts from the menu bar:
2. The "Internet Accounts" window appears.
On the right-hand side, click Add, then Mail.

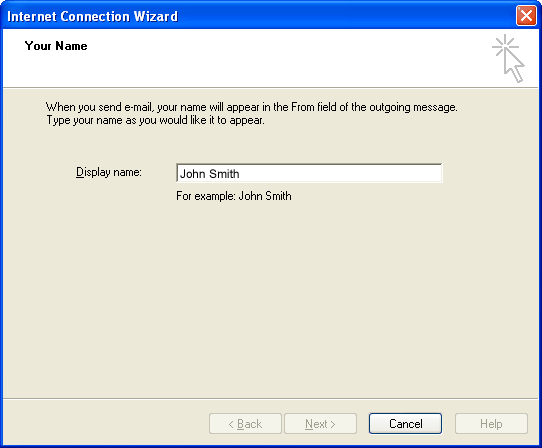
3. The "Internet Connection Wizard" window appears.
The wizard first asks for your name. This is the name that other people will see when you send them e-mail. It should usually be your real name, such as John Smith or Joan of Arc.
Type the name you want other people to see when you send them e-mail, then click Next.
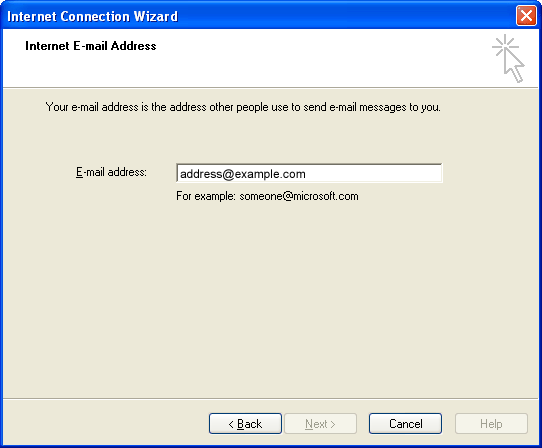
4. The wizard asks for your Internet E-mail Address.
Enter your e-mail address, then click Next. The address must be the e-mail address of the POP mailbox you created in your account management control panel.
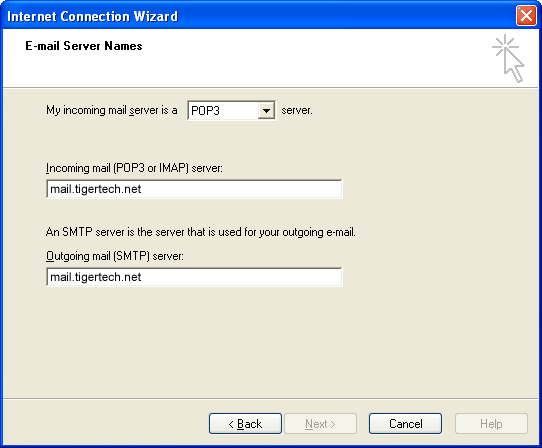
5. The wizard asks for your E-mail Server Names.
Leave the server type as POP3. Type mail.tigertech.net as the name of both your incoming and outgoing server, then click Next.
6. The wizard asks for your Internet Mail Logon.
The "Internet mail Logon" is your e-mail username and password.
- Type your e-mail address as your account name (it must be all lowercase).
- Type your e-mail password, which is the password you chose for this e-mail address when you created the mailbox in your account management control panel. Or, we may have created it for you. Remember that this password may be different from your master account password.
- If you wish, check the Remember password box to have Outlook remember your password so that you don't have to type it each time you send or receive e-mail.
The window should look like this:
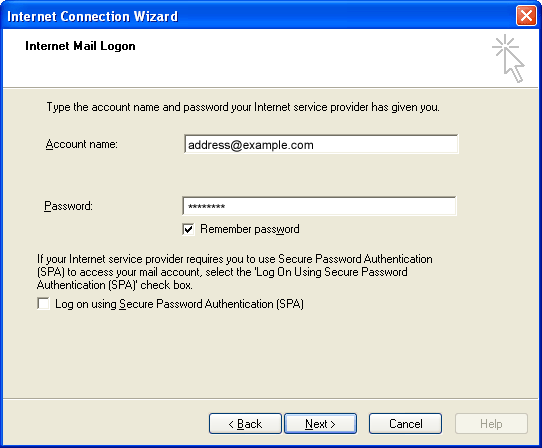
Click Next when finished.
7. Microsoft Outlook asks for a method of connecting to the Internet.
Usually you will already have a connection to the Internet. In these cases you can choose I will establish my Internet connection manually.
Click Next when you have selected the appropriate option.
8. The wizard tells you that you've entered all the information.
Click Finish.
While the wizard has collected the basic information needed to receive e-mail, one other change is needed to make sure that you can send mail. Continue with the steps below to finish setting up Microsoft Outlook.
9. Continue with Outlook setup.
The "Internet Accounts" window should still be open. Highlight the new e-mail account and click Properties.
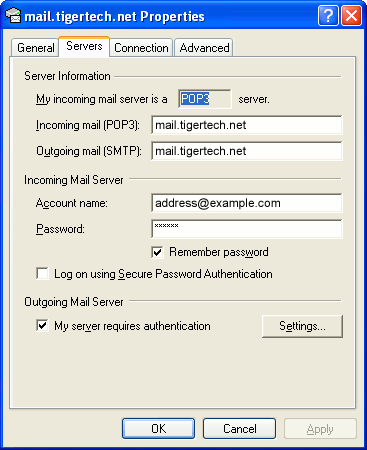
10. The "Properties" window appears.
Click the Servers tab and check My server requires authentication (at the bottom of the window). You don't need to click Settings; the default settings are fine. Also, note that you should not check Log On Using Secure Password Authentication.
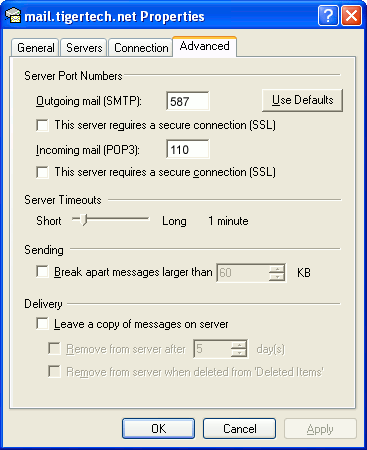
11. Change the SMTP port number.
Changing the SMTP port number ensures that your ISP will not block outgoing mail connections to our mail servers.
- Click the Advanced tab.
- Change the Outgoing mail (SMTP) port number from 25 to 587.
12. Close the setup windows.
Click OK to close the Properties window, then click Close to close the Internet Accounts window.
The setup is complete.
You're finished! Try sending yourself a test e-mail message to make sure it works.


Если ваш старый пульт сломался или вы просто хотите обновить его до более современного и функционального варианта, то самое время пульт для телевизора цена, который идеально подойдет для ваших потребностей и обеспечит комфортное управление вашим телевизором.
При покупке нового телевизора многие люди задумываются о необходимости покупки пульта для телевизора . Это связано с тем, что пульт для телевизора играет ключевую роль в управлении телевизором. Используя пульт, можно управлять телевизором, не вставая с места.
При приобретении пульта для телевизора следует рассмотреть несколько ключевых аспектов. Одним из них является совместимость пульта с телевизором . Другим аспектом является дизайн и эргономичность пульта.
## Раздел 2: Типы пультов для телевизоров
Существует несколько типов пультов для телевизоров, каждый из которых имеет свои уникальные характеристики . Одним из наиболее распространенных типов является пульт с инфракрасным сигналом . Этот тип пульта передает сигнал на телевизор с помощью инфракрасного излучения .
Другой тип пульта - это пульт с радиочастотной связью. Этот тип пульта передает сигнал на телевизор с помощью радиоволн . Помимо этого, есть пульты с блютуз-соединением, которые позволяют управлять телевизором с помощью планшета.
## Раздел 3: Выбор пульта для телевизора
При покупке пульта для телевизора следует обратить внимание на несколько моментов . Одним из ключевых моментов является совместимость пульта с вашим телевизором. Другим моментом, на который стоит обратить внимание, является дизайн и удобство использования пульта .
Кроме того, важно учитывать функциональность пульта . Некоторые пульты обладают дополнительными возможностями, такими как управление другими гаджетами . При приобретении пульта следует изучить отзывы других владельцев.
## Раздел 4: Заключение
В заключении, покупка пульта для телевизора является важным этапом в настройке домашнего кинотеатра . При покупке пульта следует обратить внимание на несколько моментов, включая совместимость, эргономику и функции . Благодаря правильному выбору пульта можно наслаждаться комфортным просмотром телевизора .