
This page explains how to set up Microsoft Outlook 98 or Outlook 2000 to send and receive e-mail for a POP mailbox that you've created. (The screen shots below are from Outlook 2000, although Outlook 98 is similar.)
Tip: make sure that the program you are using is Microsoft Outlook, and not Microsoft Outlook Express. These two similarly named programs have different set up instructions. Be sure you do not see the word "Express" on the screen when you start the program.
1. Start the Microsoft Outlook program.
You can use the Start menu to start Outlook. When it opens, click Tools, then Accounts from the menu bar:
2. The "Internet Accounts" window appears.
On the right-hand side, click Add, then Mail.

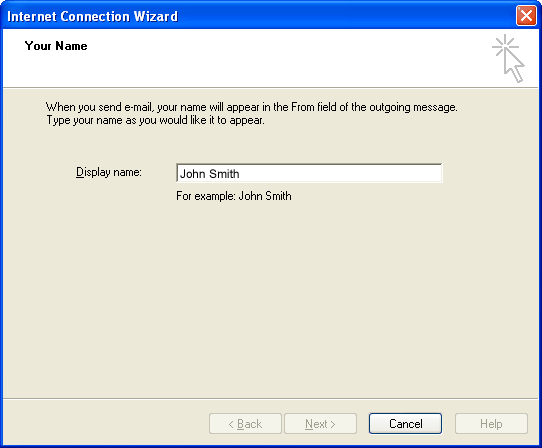
3. The "Internet Connection Wizard" window appears.
The wizard first asks for your name. This is the name that other people will see when you send them e-mail. It should usually be your real name, such as John Smith or Joan of Arc.
Type the name you want other people to see when you send them e-mail, then click Next.
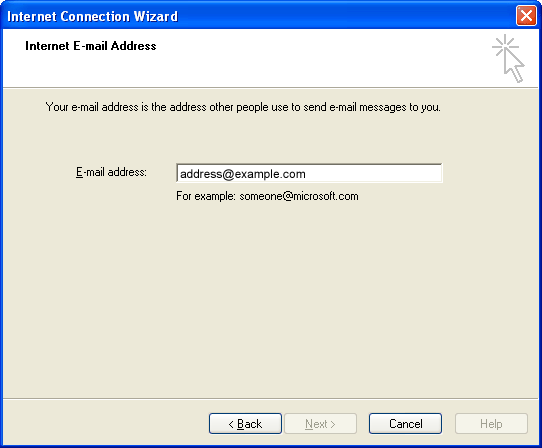
4. The wizard asks for your Internet E-mail Address.
Enter your e-mail address, then click Next. The address must be the e-mail address of the POP mailbox you created in your account management control panel.
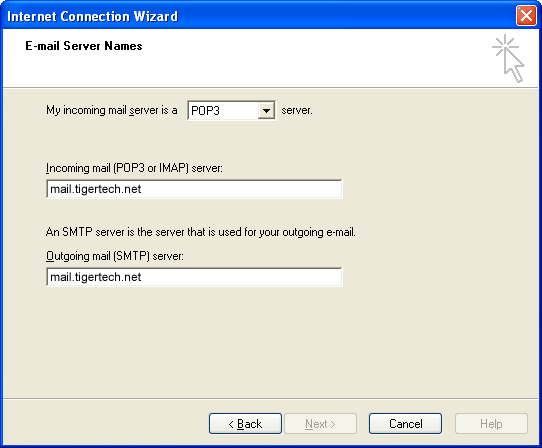
5. The wizard asks for your E-mail Server Names.
Leave the server type as POP3. Type mail.tigertech.net as the name of both your incoming and outgoing server, then click Next.
6. The wizard asks for your Internet Mail Logon.
The "Internet mail Logon" is your e-mail username and password.
- Type your e-mail address as your account name (it must be all lowercase).
- Type your e-mail password, which is the password you chose for this e-mail address when you created the mailbox in your account management control panel. Or, we may have created it for you. Remember that this password may be different from your master account password.
- If you wish, check the Remember password box to have Outlook remember your password so that you don't have to type it each time you send or receive e-mail.
The window should look like this:
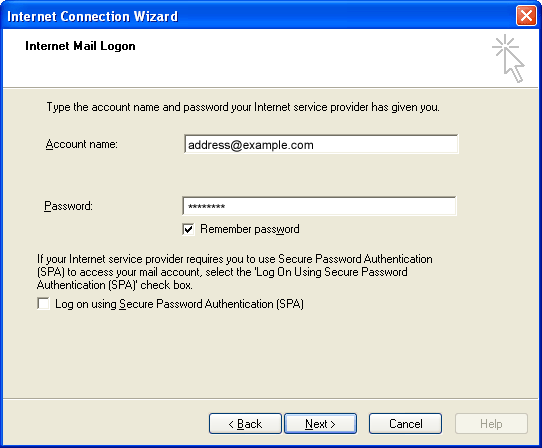
Click Next when finished.
7. Microsoft Outlook asks for a method of connecting to the Internet.
Usually you will already have a connection to the Internet. In these cases you can choose I will establish my Internet connection manually.
Click Next when you have selected the appropriate option.
8. The wizard tells you that you've entered all the information.
Click Finish.
While the wizard has collected the basic information needed to receive e-mail, one other change is needed to make sure that you can send mail. Continue with the steps below to finish setting up Microsoft Outlook.
9. Continue with Outlook setup.
The "Internet Accounts" window should still be open. Highlight the new e-mail account and click Properties.
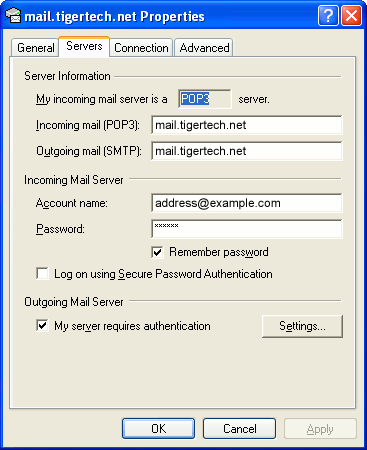
10. The "Properties" window appears.
Click the Servers tab and check My server requires authentication (at the bottom of the window). You don't need to click Settings; the default settings are fine. Also, note that you should not check Log On Using Secure Password Authentication.
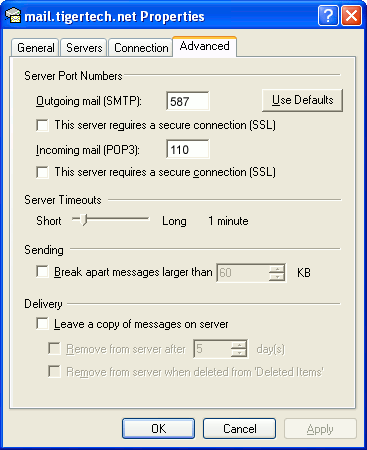
11. Change the SMTP port number.
Changing the SMTP port number ensures that your ISP will not block outgoing mail connections to our mail servers.
- Click the Advanced tab.
- Change the Outgoing mail (SMTP) port number from 25 to 587.
12. Close the setup windows.
Click OK to close the Properties window, then click Close to close the Internet Accounts window.
The setup is complete.
You're finished! Try sending yourself a test e-mail message to make sure it works.


I’ve been coming across discussions about Paybis for a while now, and I’m still trying to form a clear opinion about whether it truly deserves all the
attention it gets, but it’s definitely an interesting name within the crypto
trading space, especially when it comes to combining crypto markets with fiat currencies.
From what I understand so far, Paybis presents itself as a globally
operating cryptocurrency platforms that also supports traditional fiat money, which is something many exchanges
either limit or complicate.
What initially caught my interest was the way Paybis seems to bridge the
gap between traditional finance and the crypto world. Many
platforms focus strictly on crypto-to-crypto trades, but Paybis
appears to allow users to exchange digital currencies using debit cards.
I’m not claiming this process is flawless, but it does seem aimed at beginners rather than only advanced traders.
Another aspect worth mentioning is the range of cryptocurrencies supported.
Paybis doesn’t appear to limit itself to the most popular assets.
Instead, it offers access to multiple altcoins, which might appeal
to users who are experimenting. That said, I still wonder about things like availability, so it’s probably something potential users should investigate further.
Security and compliance are also frequently mentioned in relation to Paybis.
The platform emphasizes KYC procedures, which could be seen as reassuring for some
users, though others might find it inconvenient.
I’m honestly unsure where I stand on that, but it
does suggest that Paybis is trying to operate as a
regulated crypto and fiat marketplace.
When it comes to fees and exchange rates, opinions seem divided.
Some sources claim that Paybis is clear with pricing, while others mention that costs
may change based on currency. This isn’t uncommon in the crypto industry, but it does mean users should probably
do proper research before making decisions.
Overall, I wouldn’t say Paybis is the ultimate solution, but
it does appear to be a platform that’s worth learning more about.
For anyone who is trying to understand how crypto and fiat markets
interact, spending some time reading more about Paybis could be
useful. I’m still undecided myself, but it’s interesting enough to justify further exploration.