
This page explains how to set up Microsoft Outlook 98 or Outlook 2000 to send and receive e-mail for a POP mailbox that you've created. (The screen shots below are from Outlook 2000, although Outlook 98 is similar.)
Tip: make sure that the program you are using is Microsoft Outlook, and not Microsoft Outlook Express. These two similarly named programs have different set up instructions. Be sure you do not see the word "Express" on the screen when you start the program.
1. Start the Microsoft Outlook program.
You can use the Start menu to start Outlook. When it opens, click Tools, then Accounts from the menu bar:
2. The "Internet Accounts" window appears.
On the right-hand side, click Add, then Mail.

3. The "Internet Connection Wizard" window appears.
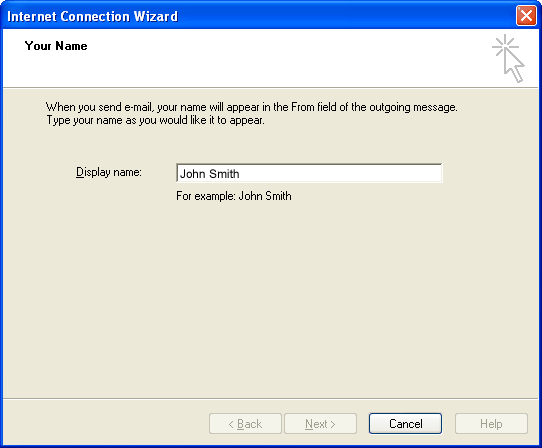
The wizard first asks for your name. This is the name that other people will see when you send them e-mail. It should usually be your real name, such as John Smith or Joan of Arc.
Type the name you want other people to see when you send them e-mail, then click Next.
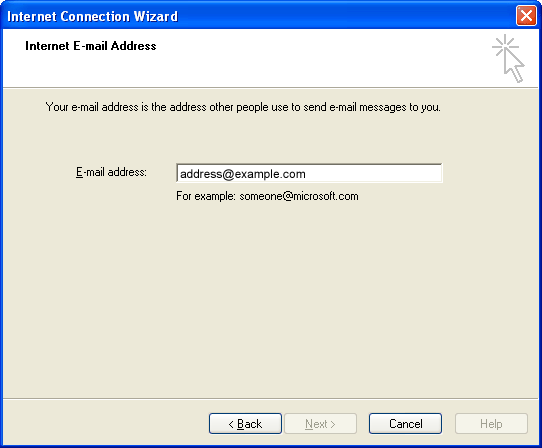
4. The wizard asks for your Internet E-mail Address.
Enter your e-mail address, then click Next. The address must be the e-mail address of the POP mailbox you created in your account management control panel.
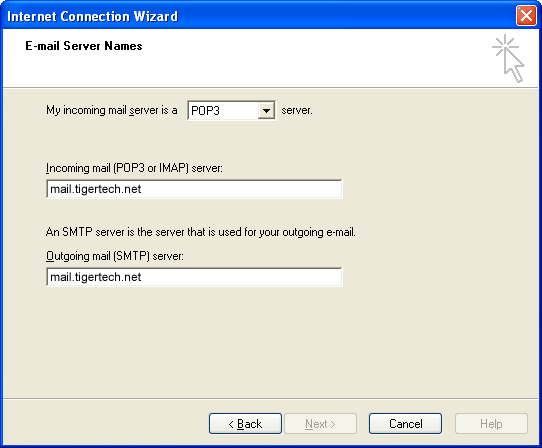
5. The wizard asks for your E-mail Server Names.
Leave the server type as POP3. Type mail.tigertech.net as the name of both your incoming and outgoing server, then click Next.
6. The wizard asks for your Internet Mail Logon.
The "Internet mail Logon" is your e-mail username and password.
- Type your e-mail address as your account name (it must be all lowercase).
- Type your e-mail password, which is the password you chose for this e-mail address when you created the mailbox in your account management control panel. Or, we may have created it for you. Remember that this password may be different from your master account password.
- If you wish, check the Remember password box to have Outlook remember your password so that you don't have to type it each time you send or receive e-mail.
The window should look like this:
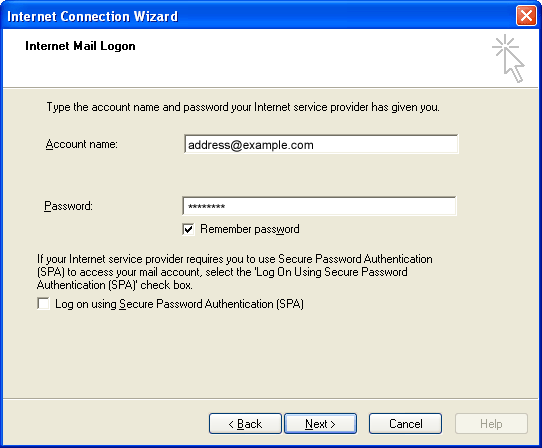
Click Next when finished.
7. Microsoft Outlook asks for a method of connecting to the Internet.
Usually you will already have a connection to the Internet. In these cases you can choose I will establish my Internet connection manually.
Click Next when you have selected the appropriate option.
8. The wizard tells you that you've entered all the information.
Click Finish.
While the wizard has collected the basic information needed to receive e-mail, one other change is needed to make sure that you can send mail. Continue with the steps below to finish setting up Microsoft Outlook.
9. Continue with Outlook setup.
The "Internet Accounts" window should still be open. Highlight the new e-mail account and click Properties.
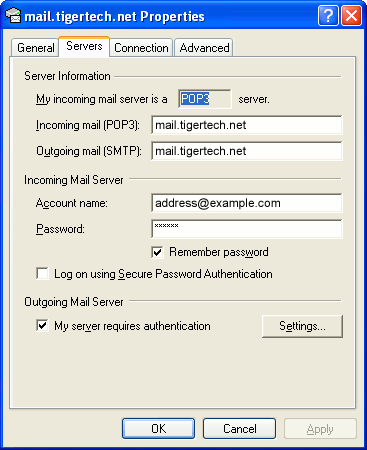
10. The "Properties" window appears.
Click the Servers tab and check My server requires authentication (at the bottom of the window). You don't need to click Settings; the default settings are fine. Also, note that you should not check Log On Using Secure Password Authentication.
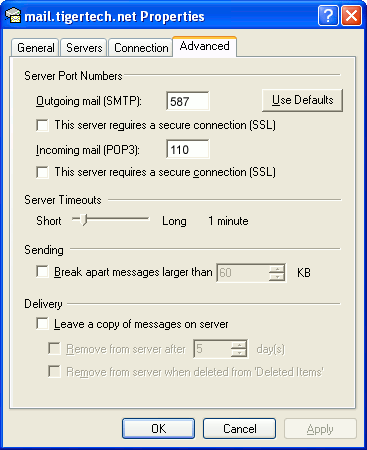
11. Change the SMTP port number.
Changing the SMTP port number ensures that your ISP will not block outgoing mail connections to our mail servers.
- Click the Advanced tab.
- Change the Outgoing mail (SMTP) port number from 25 to 587.
12. Close the setup windows.
Click OK to close the Properties window, then click Close to close the Internet Accounts window.
The setup is complete.
You're finished! Try sending yourself a test e-mail message to make sure it works.


На сайте rubber stamp maker online|stamp making online|rubber stamp online maker|stamp maker|online stamp maker|stamp maker online|stamp creator online|make a stamp online|make stamp online|online stamp design maker|make stamps online|stamps maker|online stamp creator|stamp online maker|stamp online maker free|stamp maker online free|create stamp online free|stamp creator online free|online stamp maker free|free online stamp maker|free stamp maker online|make stamp online free you can create and order the stamps you need quickly and efficiently.
that provides a platform for crafting unique and professional-looking stamps. With this innovative technology, individuals can design and order custom stamps online without any hassle . The process requires uploading a design, selecting the stamp type, and paying for the order .
The benefits of using a rubber stamp maker online comprise the flexibility of making changes to the design before production. Additionally, the tool allows for the creation of custom stamps in various shapes and sizes. This makes it a perfect choice for anyone needing custom stamps for various purposes.
Features of Rubber Stamp Maker Online
The rubber stamp maker online provides an array of tools and options that cater to different needs and preferences . One of the key features is the ability to upload custom designs and logos . This enables businesses to incorporate their brand identity into the stamps .
Another feature is the option to select from various stamp sizes and shapes . This makes it possible for individuals to experiment with different materials and designs. Furthermore, the website provides a customer support team that assists with any questions or issues .
Benefits of Using Rubber Stamp Maker Online
Using a rubber stamp maker online offers numerous benefits, including convenience and flexibility . One of the main benefits is the ability to create custom stamps from the comfort of one's own home . This eliminates the hassle of dealing with traditional stamp-making methods.
Another benefit is the wide range of design options and templates available . This enables users to create truly unique and personalized stamps . Additionally, the tool includes a feature that enables users to track their orders and shipments.
Conclusion and Future of Rubber Stamp Maker Online
In conclusion, the rubber stamp maker online is a innovative platform that offers a wide range of design options and features. The future of rubber stamp maker online is expected to be bright, with the increasing demand for custom stamps . As the technology behind online stamp-making continues to evolve, the rubber stamp maker online is likely to become an essential tool for anyone looking to create professional-looking stamps .
The potential applications range from business and marketing to art and crafts . As the technology continues to improve and expand , the rubber stamp maker online will continue to revolutionize the way we create and use custom stamps . Whether an artist looking to explore new creative possibilities, the rubber stamp maker online is an excellent choice .